How to Deep Clean a Refrigerator and Maintain It Long Term
This post may contain affiliate links. As an Amazon Associate, I earn from qualifying purchases at no extra cost to you.
In this post, you’ll learn how to deep clean a refrigerator step-by-step, along with fridge maintenance tips and simple habits to keep your fridge clean long-term.

Cleaning a refrigerator is one of those household tasks that often gets neglected because of the busyness of everyday life. It can also feel like a time-consuming chore, which makes it easy to keep putting off.
However, regularly deep cleaning your refrigerator is important for both food safety and keeping your refrigerator functioning properly. An overstuffed, messy fridge disrupts the airflow within the fridge, causing less air circulation.
A well-maintained fridge helps prevent food waste, keeps odors away, and makes it easier to see the types of foods you have. I personally love it when my food is in a clean and organized fridge.
Refrigerator Deep Clean Preparation
Before you start deep cleaning your refrigerator, get all your cleaning tools ready and organized.
Prepare Your Cleaning Supplies:
- Microfiber cloths: Perfect for wiping down shelves, drawers, and interior surfaces without leaving lint or streaks behind.
- Paper towels: Helpful for quickly cleaning up spills, absorbing excess moisture, and wiping away food residue.
- Sponges or scrub brushes: Great for loosening stuck-on messes and reaching into corners or textured surfaces inside the fridge.
- Cleaning solutions
- Vinegar and water: A natural option that helps cut grease and neutralize odors.
- Mild dish soap and warm water: Great for sticky spills and food residue.
- Multi-purpose kitchen cleaner: Works well for disinfecting shelves and drawers.
- Baking soda and water paste: Helpful for stubborn, stuck-on messes.
- Stainless-steel cleaner: Ideal for removing fingerprints, streaks, and smudges from the exterior of stainless-steel refrigerators.
- Fridge Deodorizer: Helps absorb and eliminate lingering odors so your refrigerator stays fresh between cleanings.
Prepare Your Kitchen Space:
- Clear off a section of your counter to place fridge items while you clean.
- Clean out the sink so you have room to clean fridge parts.
- Have a stainless-steel cleaner ready if your fridge is made of stainless steel.
I find that taking the time to get organized before I begin my fridge deep clean makes the cleaning process easier and less overwhelming.
Weekly Refrigerator Cleanouts vs. Deep Cleaning Your Refrigerator
Weekly Fridge Cleanouts |
Deep Cleaning Your Fridge |
|
Done every 1-2 weeks |
Done every 3-4 months |
|
Quick check for expired food |
Full removal of all food |
|
Wipe up small spills |
Wash shelves and drawers |
|
Toss old leftovers |
Clean walls and drawers |
|
Takes 5-20 minutes |
Takes 40-60 minutes |
|
Helps prevent buildup |
Resets the entire fridge |
Now let’s walk through how to deep clean a refrigerator step-by-step so you can restore your fridge to a fresh and organized space.
How to Deep Clean the Inside of Your Refrigerator
Step 1: Remove Everything from the Refrigerator
Start by taking every item out of the refrigerator. Place all items on a kitchen counter or table so you can easily see what you have at eye level. This makes it easier to sort through everything and prevents you from constantly bending down while cleaning.
Step 2: Declutter and toss expired items
Once everything is out of the fridge, take a few minutes to go through all food items. Toss anything that is expired, spoiled, or that hasn’t been used in a long time. This step helps free up space and prevents any unnecessary clutter from going back into your refrigerator.
Step 3: Take out removable shelves and drawers
Take out all removable shelves and drawers from your refrigerator. Place them in the sink so they can be deeply washed. Removing these parts allows you to reach areas of the fridge that are harder to clean when everything is still inside.
Step 4: Wash Shelves and Drawers
Using warm water and dish soap, wash all shelves and drawers in the sink. I personally like to let them soak while I clean the inside of the refrigerator by filling the sink with warm soapy water. This helps loosen any stuck-on food or spills so they are easier to clean.
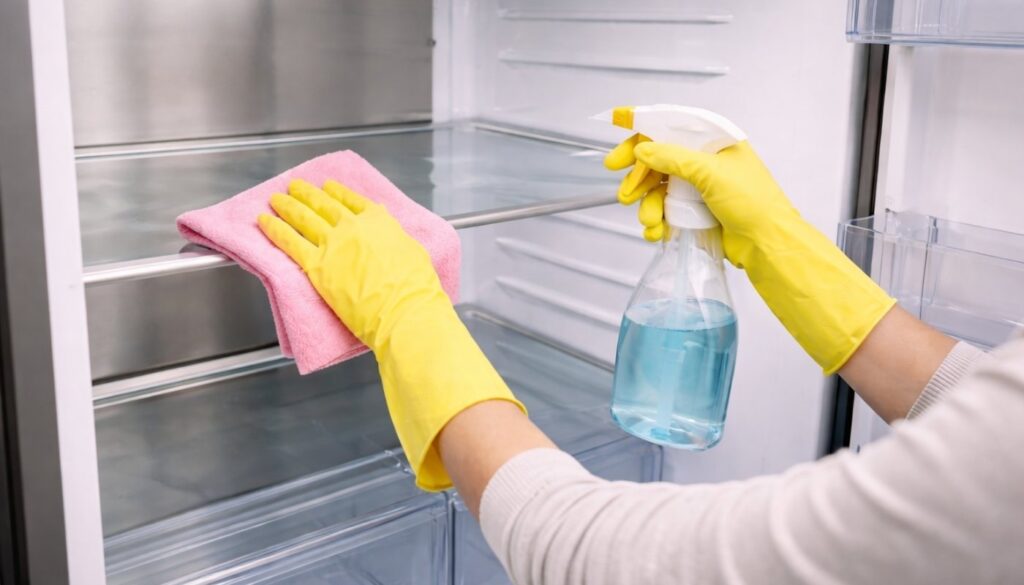
Step 5: Wipe down the interior of the Fridge
Using your preferred cleaning solution, wipe down all interior surfaces of the refrigerator. This includes walls, built-in shelves, door compartments, and any corners where crumbs and spills might collect.
Quick Cleaning Tip
If you’re into natural cleaning solutions, a simple mixture of warm water and vinegar works great for cleaning refrigerator interiors. It helps remove odors while safely cleaning food storage surfaces.
Step 6: Clean the rubber Gasket
The rubber gasket is the flexible rubber seal that runs along the edge of the fridge door. Its purpose is to create an airtight seal to keep cold air inside the fridge. Over time, crumbs and grime can collect in the folds, so be sure to wipe it down or use a toothbrush or small brush to get the crumbs out.
Step 7: Dry and Reassemble the Refrigerator Shelves and Drawers
Before putting the pieces of the refrigerator back inside, make sure everything is completely dry. Dry surfaces prevent moisture buildup and keep your fridge smelling fresh.
Step 8: Wipe Down Your Fridge Products
Something I always do before putting food back in the refrigerator is wipe down the outside of bottles, jars, and containers with a damp cloth. This step is a step that is often forgotten.
Many products, especially condiments, can create small spills and messes after they are used. Over time the bottoms become sticky, which ends up making your fridge shelves dirty again. Make sure you’re putting clean products back in your freshly cleaned fridge.
Step 9: Return Food Items and Organize
Return all food and drink items back to your fridge in an organized manner. Take this opportunity to organize items so they are easy to see and access. Keeping your fridge organized helps prevent food waste and saves you money in the long run.
For more tips on how to organize a fridge, check out my post where I share four simple strategies for keeping your refrigerator organized.
Step 10: Remove items from the freezer and wipe down the inside
Once you have completed your deep clean of the refrigerator section, move on to the freezer. Remove all freezer items and rogue frozen pieces of food.
Using a cloth and cleaning solution, wipe down the inside walls, shelves, and any drawers in the freezer. Be sure to clean up any ice buildup, crumbs, or spills that may have collected over time.
After wiping everything down, return the freezer items and place them back in an organized way so they are easy to see and access.
Step 11: Toss any unused or expired items
Toss anything that is expired, freezer-burned, or that you know will not be used. This is a great opportunity to clear out space and prevent old food from sitting in your freezer for too long.
Step 12: Return food products back into the Freezer
Once you have removed any unused or expired items, place the remaining food products back into the freezer. I like to organize mine by categories such as frozen vegetables, fruits, and meats so everything is easier to find later.
Creating zones inside your fridge can help you maintain organization and make food easier to find. If you’re looking for a way to organize your entire kitchen more efficiently, check out my free kitchen zones organization chart.
How to Deep Clean the Exterior of the Refrigerator
The outside of a refrigerator tends to get messy with food grime, little kid fingerprints, and splash streaks from the occasional tragic kitchen spill.
While you’re already deep cleaning the inside of your fridge, it’s the perfect time to wipe down the exterior as well. After all, who wants a clean fridge on the inside and a messy outside?
Step 1: Wipe down the top of the Fridge
I like starting with the top of the fridge because dust particles can fall down onto the rest of your refrigerator if you clean the front and sides first. Starting at the top prevents you from having to re-clean areas you just wiped. So, give the top of the fridge a thorough cleaning, remove any dust or debris, and wipe it down with your preferred cleaner.
Quick Tip
For safety, use a microfiber cloth or a duster with an extendable handle to easily reach the top of your refrigerator. This area tends to collect dust quickly but is often overlooked during regular kitchen cleaning.
Step 2: Remove Anything Magnetized to Your Fridge
Remove any magnets, invitations, pictures, or paperwork from the front of your refrigerator so the surface is ready to be wiped down. This is also a good time to throw out old paperwork or invitations cluttering up your fridge.
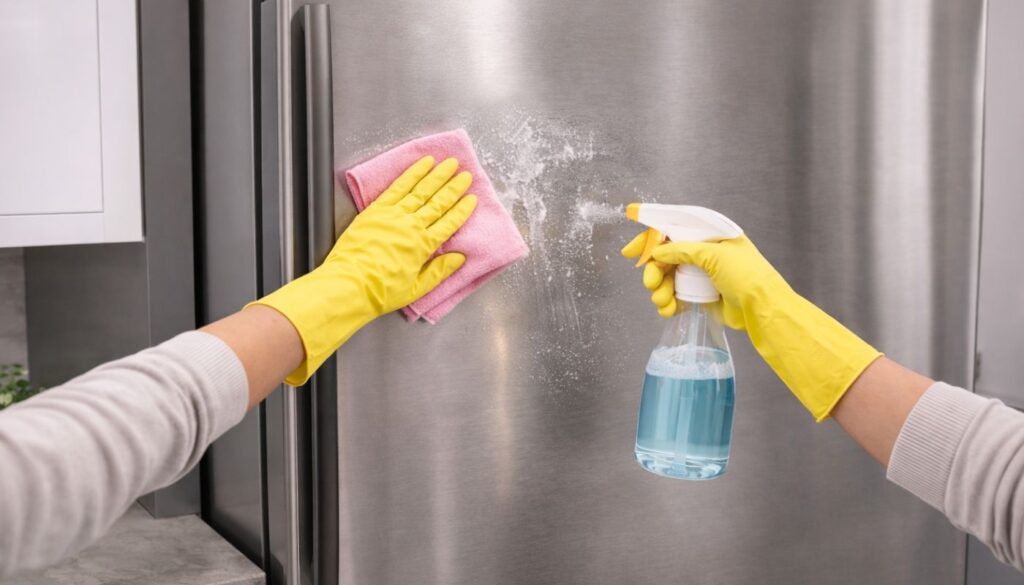
Step 3: Wipe Down the Exterior of the Fridge
Next, wipe down the front and sides of the refrigerator using your preferred cleaning solution. Be sure to clean areas that are often touched, such as the refrigerator handles and around the door edges, where fingerprints and food residue tend to build up. This helps remove grime and keep your refrigerator more sanitary.
Quick Tip
When cleaning stainless steel, always wipe in the direction of the grain of the metal. This helps prevent streaks and gives your refrigerator a smoother, polished finish.
Step 4: Use a Stainless-Steel Cleaner for Tough Spots
If your refrigerator is made of stainless steel, use a stainless-steel cleaner to remove streaks, fingerprints, and tougher spots. This helps restore shine and gives your fridge a polished look.
Step 5: Clean Behind Your Refrigerator
If possible, pull your fridge away from the wall and vacuum and mop the floor behind it. You will probably find a lot of dust, but you might also be surprised by what ends up behind your refrigerator. I know I have been.
Refrigerator Maintenance Tips to Do During a Deep Clean
Refrigerator maintenance helps your fridge perform optimally and function properly. However, it’s often neglected.
If you want your refrigerator to last longer, it’s a good idea to do a quick maintenance check during your refrigerator deep cleans. And don’t worry, you don’t need to complete every maintenance tip listed below, just the ones that apply to your refrigerator.
Here are some common maintenance tips to keep your refrigerator running efficiently:
Check Your Refrigerator Temperature
Make sure your refrigerator is set to the proper temperature. The ideal refrigerator temperature is 37–40 °F, while the freezer should be around 0 °F. According to the United States Department of Agriculture, refrigerators should maintain a temperature no higher than 40°F. Frozen food will maintain its best quality for the longest possible time when the freezer stays at 0°F. Keeping the correct temperature helps prevent food spoilage and keeps groceries fresh longer.
Vacuum the Refrigerator Coils
Dust and other debris can build up on the refrigerator coils over time, causing the fridge to work harder than it needs to. Vacuuming the coils during deep cleans can help your refrigerator run more efficiently and could expand its lifespan.
According to the U.S. Department of Energy, cleaning the condenser coils regularly can help regulate your fridge temperature and help prevent food from freezing in your fridge.
Clean the refrigerator drain hole
Some refrigerators have a small drain hole that allows condensation to drain properly. It’s usually located at the back interior wall near the bottom shelf or behind the produce drawers. If the drain hole becomes clogged, it can lead to water buildup inside the refrigerator. Make sure to clear any debris away from the drain hole so it can function correctly.
Inspect and Maintain the Refrigerator Water Line
If your fridge has a water dispenser or ice maker, it should definitely have a water line and filter that should be maintained occasionally. During your deep clean, take a moment to inspect the water line behind the refrigerator and make sure there are no small leaks.
You can also turn off the water supply, disconnect the water line, and flush it with clean water to remove any debris or buildup that may have collected over time.
Quick Tip
Replacing your refrigerator filter every 6 months also helps keep the water line clean and prevents buildup.
Check the Refrigerator Air Vents
All refrigerators have small air vents that allow the cold air to circulate properly. If food items block these vents, it can cause uneven cooling inside the fridge. I have experienced this myself when food placed too close to the vents ended up getting frostbite. During your deep clean, make sure the vents are clear so the refrigerator can circulate air properly.
How to Keep Your Refrigerator Clean Long Term
Keeping your refrigerator clean long-term means making weekly fridge resets and deep cleans every several months a priority. Keeping your refrigerator clean long-term means making weekly fridge resets and deep cleans a priority every several months.
Trust me, it’s much better to stay ahead of the mess than deal with a smelly fridge later.
Here are a few of my strategies for maintaining a clean refrigerator:
- Do a weekly fridge reset: Look through your fridge once a week and throw out anything expired or no longer fresh.
- Wipe up spills right away: In the past, I was totally guilty of leaving spills in my fridge for days. Now I clean them right away to prevent odors and sticky buildup.
- Keep similar items grouped together: When items are grouped together, they are easier to find and less likely to be forgotten.
- Use refrigerator organizers: They help contain spills and keep items grouped together so your fridge stays cleaner and more organized.
- Avoid overcrowding your refrigerator: Too many items can block air circulation and make it harder to see what you have.
- Do a quick fridge wipe-down every few weeks: Even a fast wipe of shelves and drawers can prevent grime from building up.
- Schedule regular deep cleans and maintenance checks: I like to deep clean my refrigerator three times a year. Once in the spring, once in the fall, and once in the winter. Regular deep cleans and maintenance checks help your refrigerator run efficiently and last longer.
If keeping your fridge clean feels difficult, developing simple kitchen habits can make a huge difference. These 24 ways to keep a kitchen clean when life gets messy can help keep your entire kitchen more manageable.
Frequently Asked Questions About Deep Cleaning a Refrigerator
1. How long does it take to deep clean a refrigerator?
Set aside 30-60 minutes to deep clean your fridge. The exact time will depend on how much food needs to be sorted and how much buildup needs to be cleaned. Regular maintenance can make deep cleanings much faster and easier.
2. How often should you deep clean a refrigerator?
A refrigerator should typically be deep cleaned every 3 to 4 months. Regular deep cleaning helps remove food residue, spills, and odors that can build up over time. In between deep cleans, doing a quick weekly check for expired food and wiping small spills can help keep your refrigerator clean and fresh.
3. Do I have to unplug my refrigerator to deep clean it?
In most cases, you don’t need to unplug your refrigerator to wipe down the inside. However, if you plan to clean behind the refrigerator, clean the coils, or move the appliance away from the wall, I recommend unplugging it for safety.
4. What should not be used when cleaning the inside of your refrigerator?
Avoid using harsh chemicals, bleach, or abrasive scrubbers inside your refrigerator. These products can damage the surfaces and leave behind strong odors that could affect stored food. Instead, use gentle cleaners like dish soap, vinegar, or a multi-purpose cleaner.
5. How do you remove bad odors from your refrigerator?
To remove odors from your refrigerator, start by throwing away any expired or spoiled food that may be causing the smell. Keeping up with weekly or bi-weekly cleanouts and quick wipe-downs can help prevent odors from building up in the first place. You can also place an open box of baking soda, a small bowl of coffee grounds, a bowl of vinegar, or activated charcoal inside the fridge to help neutralize lingering odors.
6. How do you remove stains when deep cleaning a refrigerator?
To remove stuck-on stains inside your refrigerator, start by wiping the area with warm soapy water to loosen the residue. For tougher stains, make a paste using baking soda and water, let it sit on the stain for 5-10 minutes, and then gently scrub the area with a sponge or microfiber cloth. Finish by wiping the area with a damp cloth.
7. How to monitor temperature in a refrigerator?
Place an appliance thermometer in a glass of water on the middle shelf for 5-12 hours to measure actual food temperature rather than air temperature. The ideal temperature is 37 °F, but it must remain below 40 °F.
Final Thoughts on How to Deep Clean a Refrigerator
Deep cleaning a refrigerator may seem like a complicated task, but breaking the process into steps makes the process so much more manageable. By removing all food, washing shelves and drawers, wiping down interior surfaces, and organizing items before putting them back, you can keep a fridge fresh, sanitary, and easy to use.
Once you know how to deep clean a refrigerator, keeping it clean becomes easier with regular maintenance like weekly cleanouts or wiping out spills right away. The key is making this a habit and a priority. When you open up your clean and organized fridge, you’ll not only enjoy a more functional kitchen but also have peace of mind knowing your food is stored in a clean space.
Be sure to check out my related post before you leave
- How to Organize a Fridge So It Actually Stays Organized
- 24 Ways to Keep a Kitchen Clean When Life Gets Messy
- Improve Your Kitchen with a Free Kitchen Zones Organization Chart
- How to Store Kitchen Items in Cabinets and Drawers Efficiently by Zones
- How to Declutter and Organize Your Pantry Using Pantry Categories

